On Christmas day we had a vegan and a non Christmas pudding eater to lunch. So to make it easier on myself I decided to try a pudding which would appeal to both.
Jus Rol pastry
For the Sponge
100g plain flour
25g ground almonds
50g caster sugar
1tsp baking powder
110ml water
70g veg oil
1/2 tsp almond essence
For the Cranberry Jam
375g cranberries
150g caster sugar
zest and juice of 1 orange
1/2 tsp ground cinammon
To decorate
icing sugar
flaked almonds
orange juice and zest
Place the rolled out pastry in a greased tart tin, pressing it into the corners/edges. Put some grease proof paper onto of the pastry and fill with baking beans. Pop into an oven preheated at 180 degrees C (fan assisted) 200 degrees C (normal oven) for 15mins or until golden brown.
Remove the greaseproof paper for an extra 5 minutes to crisp up the pastry.
Meanwhile make the cranberry jam by placing all the ingredients into a large saucepan and simmering until thick. Taste and add sugar if necessary.
One the pastry is cooked spread the cranberry jam ontop.
In a separate bowl place all the ingredients for the sponge and and mix together well.
Dollop the sponge mixture onto the jam and spread evenly.
Bake for 20-25mins in the preheated oven at 180/200 degrees C.
Once the tart has cooled a little turn it out onto a wire rack and make up the icing by mixing a very small amount of icing sugar with the juice of an orange until it comes to a drizzling consistency.
Drizzle the icing over the tart in horizontal and vertical lines. Sprinkle over some flaked almonds and orange zest to decorate.
In a seperate bowl mix the
Friday, 30 December 2011
Thursday, 20 October 2011
WINE GUM TREE
A present for Dad who is a wine gum fanatic!!
They are easy to do and you can make them with all different kinds of sweets. The maltesers versions look really good too.
What you need
Florists oasis
silver foil
cocktail sticks
wine gums
plant pot
dowling/cane
ribbon

My son decorated the plant pot with fingerprints. You can paint or leave it plain.
As this is quite a big tree and top heavy I used cane in the end, if your oasis is small then you can get away with using dowling for the trunk.
I also got my husband to put some cement in the bottom to stabilise the cane but you can pack it in using stones, newspaper etc depending on the weight of the top of the tree.
Cover your oasis in silver foil to stop the particles coming off.
Put the oasis onto the stick supported in the plant pot and make sure it's stable.
Cut your cocktail sticks in half and place a wine gum on the end of each small stick.
Push the sticks into the oasis making sure the sweets are really close to each other. You want to pack them in as much as you can so there are no gaps inbetween the sweets.
Finish off the plant pot with a ribbon and cover the top of the plant pot with some tissue paper to hide the packing material in the pot. Scatter over a few extra sweets.
Monday, 17 October 2011
CHRISTMAS DECORATIONS
After making the little gingerbread men last year I was hoping to find something I could make again this year. We had a trip to some of the local garden centres at the weekend and they are already starting to stock Christmas items so I had a good look around to give me some inspiration.
I have decided to have a go at making some reindeers this year. Definitely with felt but maybe flat rather than stuffed ones. I could use them to make a garland to hang over the fireplace or individual ones to hang in the windows, I've yet to decide! I have loads of bells left over from the job lot I bought for the elf clogs last year so I can use some of those to add detail to the reindeers. Time to restock on some felt I feel!
I have decided to have a go at making some reindeers this year. Definitely with felt but maybe flat rather than stuffed ones. I could use them to make a garland to hang over the fireplace or individual ones to hang in the windows, I've yet to decide! I have loads of bells left over from the job lot I bought for the elf clogs last year so I can use some of those to add detail to the reindeers. Time to restock on some felt I feel!
Sunday, 16 October 2011
GEOMETRIC CAKE
I've not been baking much recently so it's been good to get back in the kitchen over the last couple of weeks. There's nothing like a birthday or two to spur me on.
My dad's birthday is just under a week after my sons but I couldn't face making another maderia cake so I found a recipe for a chocolate sponge which I though would look nicer once the cake was cut into as I was planning on using brown for some of the decoration. The sponge turned out to be the perfect base for this cake too as it turned out of the tin well and gave the cake a nice smooth edge (which was really what was needed for the geometric nature of the pattern)
I bought two packs of blue sugarpaste thinking I might need a double layer of it but as the sponge held the shape so well I didn't need it all.
Once the cake was covered I used a variety of cutters to make the circles in white and brown to finish off the cake.

Tuesday, 11 October 2011
JUNGLE BIRTHDAY CAKE


I started off with the animals on this cake and had a go at a different variety each evening over several days.
I did the snakes first as they were the easiest, then hippos, monkeys, lions and cheetahs.


The cake was made of two tiers of maderia crumb coated in buttercream and covered with green sugar paste. To add a bit more detail to the cake I made some jungle trees and a waterfall with rocks to border it a bit. To bring the joins together I made some grass by pushing the sugarpaste through a grass effect nozzle. I am sure a garlic press would work better here but mine was broken!!
There were plenty of animals left to make a cupcake tower for the family birthday party the day after too.
My (not so) little man was really pleased with his cake so it made it more than worthwhile.


Sunday, 9 October 2011
HOBBY HORSE
I had planned on making this hobby horse as a Christmas present for my little man but when my husband decided he was building him a play castle for his birthday I thought the horse would go well with it.
I enlarged the outline of a horses head on the photocopier and then cut out two heads using dark brown cotton. Once they were pinned together back to back I made a start on the mane (which actually took ages!). Using lots of lengths of different coloured wool I lined them up on a long piece of card ready to position.
When the mane was finished I slid it off the card so that the wool lengths had a loop at the top of them and were lying in the correct place on the horses head. Next the head was sewn and the mane sewn into place at the same time.
The head was then ready to be reversed and stuffed. Ears were sewn on with hidden stitching, eyes made out of felt were added as was a bridle made of east of india ribbon and curtain rings. The finished head was then stapled into place onto an old broom handle and we had one finished hobby horse.


Wednesday, 14 September 2011
THE HOBBY HORSE PROJECT
My son's 4th birthday is coming up in a few weeks and I have been meaning to get started on a hobby horse for him for weeks. Now playschool has resumed I have a bit more enthusiasm to get started but so far all I have done is cut out the fabric for the head and the ears. I haven't found a pattern that I want to follow entirely but have taken bits from several patterns.
Tonight I am going to have a play around with some different coloured wool to make the mane and see where we go from there. Hopefully I will begin to see it coming together which will inspire me to get going!
JAMMIE DODGERS: BIG MISTAKE
My little boy had asked if we could make some jammie dodgers, so a couple of days ago we set to work. I used a recipe I found in Fay's Family Food but I must have made a big mistake somewhere along the line. The dough was ok to roll out but once baked in the oven they just fell apart!
They look quite tasty but I think I must have weighed out the sugar wrong as they aren't very sweet and the consistency is (very!) wrong.
Who knows what happened there: a combination of interruptions from a little one and baby brain I expect!
I will try again and vow to double check everything as it goes into the bowl.

NATIONAL CUPCAKE WEEK
So the macaroons are still waiting to be made, shelved in favour of my beloved cupcake! Well it is National Cupcake Week it would be rude not to.
Where to look for something tasty, impressive yet easy to make? :The Hummingbird Bakery of course. The new book Cake days has so many recipes I've been dying to try so this week was the perfect excuse.
Yesterday I made their Hot Chocolate Cupcakes, which are delicious and not as sickly sweet as they sound.

Wednesday, 7 September 2011
THE GREAT BRITISH BAKE OFF
Hurrah, the Great British Bake Off is back on tv. I missed last weeks episode as we were away on holiday so I caught up on the bread episode last night before watching this weeks about biscuits.
I have never liked macaroons but after watching them being made so perfectly (and some not so perfectly) last night I really want to have a go. They look so pretty and who'd have known that you could have so many different combinations of flavours. So now I'm off to find some willing volunteers to eat them so I can get into the kitchen!!

I have never liked macaroons but after watching them being made so perfectly (and some not so perfectly) last night I really want to have a go. They look so pretty and who'd have known that you could have so many different combinations of flavours. So now I'm off to find some willing volunteers to eat them so I can get into the kitchen!!
Monday, 22 August 2011
DECORATING BISCUITS
We took advantage of the offer on baking goodies in Sainsbury's last week and my three year old chose some sprinkles and icing to decorate some shop bought rich tea biscuits.

If we'd have had more time it would have been even better to bake the biscuits ourselves but he had fun and it kept him occupied for a while on a rainy afternoon!

SODA BREAD
I came across this by mistake as I had been meaning to make sourdough but after reading the recipe I realised I hadn't enough time to bake it. Then I stumbled across Rachel Allen's soda bread recipe.

Very quick to make, no yeast or proving required and goes great with soup!

DANISH PIZZAS
These were a recipe from Tana Ramsays Family Kitchen. I like to keep the freezer stocked with different things for packed lunches and these do freeze well.
It is basically a pizza but just rolled up to contain the topping for transport!

It is basically a pizza but just rolled up to contain the topping for transport!

BAKERELLA BURGER CAKES
I've been desperate to try these for ages after seeing them on the Bakerella blog. So I decided to give them a go for my brothers birthday.
First I downloaded the template for the baskets and printed out onto card. I wanted the paper lining the tray and the fries packets to be personalised so these were amended on the computer before printing out on tracing paper and heavyweight paper. These were quite easy to assemble so I did them the night before.
The burger buns are just a normal cupcake recipe, once these are cooled you cut them in half to make the bun.
Next was the burger.These were made using a chocolate fudge brownie recipe. Then once they have cooled right down I used a champagne flute to cut out the right sized burger for the bun.
The fries were made using a recipe I found online for rolled sugar cookies. The dough was made and rested for 6 hours before rolling out and slicing thinly to bake. They only took 6 minutes to bake in the oven and once they had cooled a little they were dipped in melted butter and rolled in sugar to give the salty appearance.
When I was ready to assemble the cakes I split some buttercream into 3 small bowls and added appropriate food colouring to make the lettuce, mustard and ketchup.
This was piped onto the round brownie before sandwiching between the cupcake halves.
Once all the baking was done it was time to assemble the burger tray!


Monday, 25 July 2011
COURGETTE LOAF
We have an abundance of courgettes at the moment (unfortunately not from our garden, ours don't seem to be growing very quickly at all) kindly donated from a neighbour.
I wanted to use them in a loaf, so I found a recipe in Rachel Allen's Bake.
The final result was not what I was expecting it is more of a sweet bread than a savoury one, never the less it still went quite well with some soup for lunch.
I'm still on the look out for a more savoury version of this!
Here's the recipe from the Rachel Allen book:
400g plain flour
1/2 tsp salt
1tsp bicarbonate of soda
1/2tsp baking powder
1tsp ground cinnamon
1/4tsp freshly grated nutmeg
300g caster sugar
100g demerara sugar
3 eggs beated
200ml sunflower oil
2tsp vanilla extract
380g courgettes, grated (skin left on)
75g walnuts ( I omitted the walnuts as my little boy doesn't like them)
two loaf tins
Preheat the oven to 150 degrees C and butter and flour the loaf tins.
Sift the flour, baking powder, salt, bicarbonate of soda, baking powder and spices into a large bowl. Add both sugars and mix.
Add the beated eggs, oil, vanilla extract and grated courgettes and mix well. Add the walnuts and divide between two tins.
Bake in the oven for 1 hour to 1 hour and a quarter or until a skewer comes out clean. Allow to cool in the tin for 20mins before turning onto a wire rack.
Rachel recommends serving on it's own or toasting and spreading with butter.
This can keep for up to 10 days when wrapped tightly in cling film.
Monday, 18 July 2011
DAISY CUPCAKES
Again this is the same basic cupcake recipe (see St Patricks Day cupcakes) and decorated simply with fondant.
Once the cake is cooked and cooled you might need to slice the top of the cakes off to make them flatter.
(chefs bonus here as you get to eat all the pieces!)
Spread a small amount of buttercream ontop of the cake and try to keep it as level as possible.
Roll out your fondant (I just used white here as I wanted to keep it simple) and cut it out using a round cutter in a similar size to your cupcake.
Place the fondant circle ontop of the cake and smooth over if necessary.
Using a daisy cutter punch out a your daisy shapes. Using a bone tool press gently in the middle of the daisy to create a dip in the middle of the flower.
Mix some fondant with some yellow food colouring or paste and make a small ball for the daisy centres.
Use a small paintbrush to paint a little bit of water ontop of the cake in the middle to help the fondant daisy stick.
Then place your daisy in the middle of the cupcake. Using the paintbrush again put a small amount of water on the centre of the daisy and add the rolled yellow fondant ball.


You can use the same method to make any topping you wish. I also did some butterflies in pink and purple sprinkled with a bit of glitter to finish.

ROSE SWIRL CUPCAKES
I had been so excited about my new Wilton nozzle arriving this morning so I could have a go at some rose style cupcakes but the postman came and no nozzle!
I still had a go anyway using a similar plastic nozzle I already had and the result wasn't too bad.
I made the icing by painting a coloured paste (grape violet) inside a disposable piping bag.
Then you fill the piping bag with buttercream.
Squeeze a little bit out until the purple starts to come through.
There are loads of tutorials and videos out there on how to pipe a rose but basically using a nozzle in the style of the Wilton 1M you start at the centre of the cupcake and pipe in circles moving outwards.
As you pipe it give the tops of the icing a coloured effect.
Then there had to be a sprinkling of lilac glitter to finish the cakes off!

Sunday, 17 July 2011
BAKING BAGS
Well what a horrible and rainy afternoon it was today!

Luckily I had my sewing machine to keep me busy whilst the boys were out.
I decided to make up a baking set for a friends daughter's birthday.
With the fairy cookbook already ordered and on it's way from Amazon I made up a cute little drawstring bag to hold some baking paraphernalia to go with it.
Now I just need to add some fairy dust and sprinkles and it's ready to go.

I also made a few extra to pop on ebay too!!
Friday, 15 July 2011
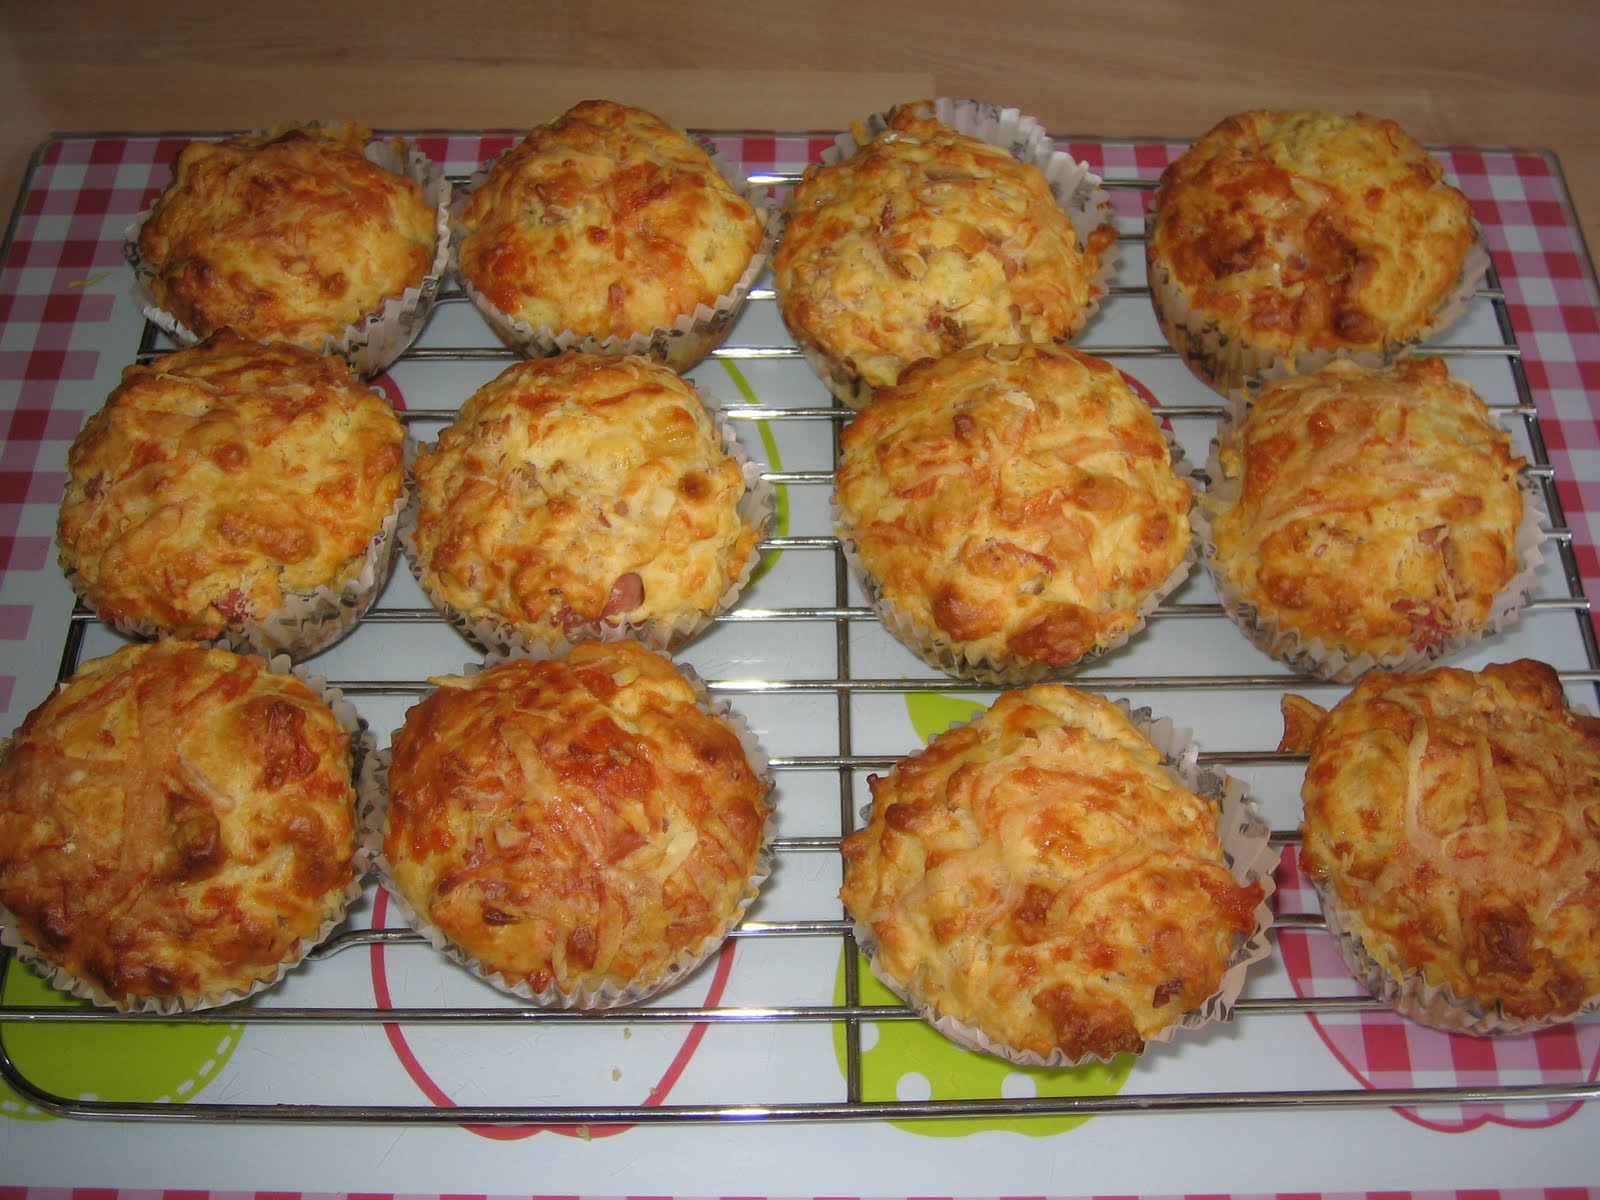
HAM AND CHEESE MUFFINS
Muffins made today, all ready to freeze for packed lunches next week. These are taken from Tana Ramsay's Family Kitchen. It makes a batch of 12 and they do freeze well.
300g self raising flour
1/2 tsp paprika
1/2 tsp mustard powder
75g butter
185g mature cheddar
6 slices of ham cut into 1cm squares
250ml milk
1 egg, beaten
Parmesan cheese, grated
Preheat the oven to 190 degrees C.
Sieve the flour, mustard and paprika together and rub the butter in until it resembles breadcrumbs.
Add the ham and cheese and give it a stir.
Add the milk and the egg, mix to combine.
Spoon the mixture into 12 muffin cases and top with some Parmesan cheese.
Bake for 20mins in a preheated oven.
Leave to cool on a wire rack.
(also lovely warm from the oven!)

Tuesday, 12 July 2011
RASPBERRY JAM
Our local fruit farm is certainly getting lots of business from us this year. We had another trip at the weekend to collect raspberries for my little ones favourite jam.
1.8kg raspberries
1.8kg sugar
While your jars are sterilising in the oven pop the sugar in a glass bowl in too so it can warm up.
Put the raspberries into a large pan and simmer for 5 - 10mins until the fruit is has reduced down to juice and pulp. Add the warmed sugar and stir to dissolve.
Increase the heat and bring to a rolling boil. Boil for 5 -10mins until it has reached 104 degrees C (or do the plate test).
Pot the jam into the sterilised jars, seal and label.


Saturday, 9 July 2011
REDCURRANT JELLY
Some kindly donated redcurrants went into make 4 jars of lovely redcurrant jelly which is now stashed away until Christmas!
I used a recipe from a book I found in the local library called The allotment cookbook, throughout the year.
This book has loads of good recipes in which I have found useful for all our garden produce!
900g redcurrants (including stalks)
900g approx granulated sugar
Add the redcurrants, stalks and 600ml water into a large pan and bring to boil over a medium hear. Reduce the heat and cook for about 10 mins until the currants are soft. Mash to a pulp.
Tip the pulp into a jelly bag and leave to strain over a bowl for several hours.
Measure the strained juice. You will need 450g sugar per 600ml of juice.
Pour the juice into a large pan and add the sugar, stirring to dissolve. Bring this to boil and cook on a rolling boil for 10-20mins or until setting point is reached. (Remove the pan from the heat to test).
Pot into warm sterlised jars.
The jelly keeps for up to 9 months.
BLUBERRY BREAKFAST MUFFINS
As a bit of a weekend breakfast treat I made a big batch of Oat and Blueberry muffins from Tana Ramsays Real Family Food.
340g self raising flour
150g light brown sugar
25g porridge oats plus extra for sprinkling
180ml buttermilk
125ml veg oil
150g blueberries (the recipe says to defrost if using frozen but I put them in frozen and find they are fine)
1 egg, beaten
Preheat the oven to 180 degrees C and line a muffin tin with 12 paper cases,
Sieve the flour into a bowl and add the sugar and oats and mix thoroughly.
Add the buttermilk, egg, veg oil and mix in the blueberries. Mix carefully as you don't want to over mix or crush the bluberries as they are best when they burst in the muffin when baking.
Spoon into the cases, sprinkle some oats ontop of each muffin and bake for 15-20mins.
Cool on a wire rack.
As raspberries are coming in early this year you could replace the blueberries with raspberries. They go just as well with the oats.
Friday, 8 July 2011
BLACKCURRANT JAM
We had a productive Sunday afternoon fruit picking so Monday was spent jam making.
1.8kg blackcurrants
2.75kg granulated sugar
1.4l water
Put the blackcurrants into a large pan with the water and bring to the boil, reduce to simmer for at least half an hour. The blackcurrants should be soft and squashed easily.
Meanwhile put the sugar in a low oven (whilst your jars are in there sterilising) for 15 minutes. Warming the sugar helps it to dissolve when added to the blackcurrants.
Tip the sugar into the fruit and stir until completely dissolved.
Bring to the boil again and boil rapidly for 6-8 mins (don't stir at this stage).
If you have a sugar thermometer it will be doe when it reaches 104 degrees C otherwise take the jam off the heat and do the plate test to see if it's reached setting point.
Pot the jam into warmed sterilised jars and seal.
BRIDE AND GROOM CUPCAKES
As a little extra to take along to a friends wedding reception I have made them some bride and groom cupcakes. The cake is cooked as normal and then topped with a small amount of buttercream to help the fondant adhere to the cake.
My cutters were either too big or too small to get the perfect size circle for the topping of the cupcakes so I improvised using a glass, which worked surprisingly well!


My cutters were either too big or too small to get the perfect size circle for the topping of the cupcakes so I improvised using a glass, which worked surprisingly well!


NURSERY BUNTING
I've wanted to have a go at bunting for so long and now I can't work out why I had left it so long. It's so simple to do and effective once it's sewn to the ribbon.
I made it reversible by sewing two triangles back to back and turning them the right side out before sewing to the bias binding.
I think the first one took about half an hour to complete the second a little quicker - have a go!!

I made it reversible by sewing two triangles back to back and turning them the right side out before sewing to the bias binding.
I think the first one took about half an hour to complete the second a little quicker - have a go!!

Thursday, 9 June 2011
BUTTERFLY BIRTHDAY CAKE
I attempted another cake from Simply Party Cakes last weekend.
It took a while to do as there was lots of small pieces involved but the end result was worth it! It was also the perfect excuse to test out all my new tools for the first time.
Next time I will double up the sugapaste icing and give it 2 layers to give an even smoother finish to the cake.
I can't wait to get started on the next cake!!

LEMON AND DILL MUSTARD
I have bought a couple of copies of the new magazine Simply Homemade. The latest edition has a recipe for a lemon and dill mustard which I decided to give a go this week.
After finding a good source of yellow mustard seeds (Our local Asian Supermarket) I could make a start.
The mustard seeds, vinegar, fennel seeds and lemon rind and juice needed to be soaked overnight.
But once thats done all you need to do the next day is to add the salt, dill and honey and whizz in a food processor. It recommends that you don't whizz too finely as it increases the strength of the mustard and this is supposed to be a light summery version.
200g yellow mustard seeds
150ml white wine vinegar
juice and zest of 2 lemons
1tbsp fennel seeds
1tbsp sea salt
6tbsp honey
1tsp dried dill
Once you've whizzed it up put into clean, sterilised jars and seal. This mustard keeps for at least a year.
Sunday, 24 April 2011
PROFITEROLES

In addition to the meringues there was a chocolate pudding too, well it is Easter after all!
I have avoided having a go at profiteroles for years and I really now have no idea why. This is a nice easy recipe from Tana Ramsay's Real Family food, a great introduction to choux pastry!
I have included Tana's recipe here but have a read of it first if your going to have a go as there are a few things you'll need to have ready to go such as the basin of cold water and the skewer for the holes in the bottom of the profiteroles.
75g butter
225ml water
100g plain flour sieved
1tsp sugar
3 medium eggs
200g plain chocolate
125ml double cream
200ml whipping cream
1tbsp icing sugar
Preheat the oven to 200 degrees C.
Put the butter and water into a pan and bring slowly to the boil. Once it is boiling tip in the flour and sugar and take the pan off the heat.
Stir as fast as you can and beat the mixture with a wooden spoon. It becomes thick and glossy and comes away at the sides of the pan.
Stand the pan in a basin of cold water to cool the mixture quickly. Then beat in the eggs one at a time, the mixture will become shiny and drop off the spoon.
Place teaspoons of the choux pastry onto baking sheets lined with greaseproof paper, keeping a good distance between each one as they do spread.
Bake for 20-30mins until crisp and golden.
Remove from the oven nad make a pea sized hole in the bottom of each one with a skewer, leave them upside down and return to the oven for 5 mins. This stops them from getting soggy inside.
Place on a wire rack to cool.
Put the chocolate and double cream into a bowl over a pan of simmering water and mix to create a rich sauce.
Whip the whipping cream and icing sugar together until thick.
as your ready to serve cut each bun in half and fill with the cream. Stack on a plate and pour over the chocolate sauce.
BLUSH MERINGUES

For Easter day I made some blush meringues using the recipe from Good Food
They are quite easy to make and the subtle pink in the meringue looks lovely against the crushed fruit filling. A big thumbs up for this recipe. The mascarpone in the centre also makes it not too sweet and cloying, perfect after a big meal.
Thursday, 21 April 2011
CHOCOLATE CORNFLAKE NEST CAKES
This couldn't be easier and tastes great too. My 3 year old loved helping to make these and loved eating them even more.
Just incase you don't already have a recipe for these:
Just incase you don't already have a recipe for these:
- 100g plain or milk chocolate
- 1tbsp golden syrup or runny honey
- 50g butter
- 75g cornflakes or other cereal
Melt the chocolate, syrup and butter together in a pan on a low heat, or in the microwave.
Stir in the cornflakes.
Spoon into 12 cake cases and using your thumb press into them to create a nest. Add 3 or 4 eggs to each nest.
Put in the fridge to set.


Thursday, 17 March 2011
ST PATRICKS DAY CUPCAKES
I made these cupcakes to celebrate St Patrick's Day and I did buy the shamrock sprinkles and cases specifically for this occasion but these cakes can be made with any cases or topping for any celebration.
125g unsalted butter, softened
125g caster sugar
2 large eggs
125g self raising flour
1/2 tsp vanilla extract
2-3 tbsp milk
Preheat the oven to 180 degrees C.
Cream together the butter and sugar until fluffy and light. Add the vanilla and the eggs one at a time with a spoonful of flour inbetween each one.
Add the remaining flour and then add the milk to loosen the mixture to a dropping consistency.
Divide the mixture between the cases (this will make about 12 fairy cake cases or 8-9 cupcake/muffin cases)
and bake in the oven for about 15mins. Do keep checking though through the oven door if poss as they may need a little longer.
Once they are cooled you can decorate with buttercream icing piped onto the top.
I use the recipe from The Hummingbird Bakery and a rose nozzle to top my cupcakes then add the sprinkles afterwards.
Vanilla Frosting
250g icing sugar, sifted
80g unsalted butter, at room temp
25ml whole milk
a couple of drops of vanilla extract
Beat the icing sugar and butter together using an electric whisk or mixer until it comes together. Slow the speed down.
Combine the milk and vanilla in a bowl and then add to the butter mixture a few tablespoons at a time. Turn the speed up a little and keep beating until the frosting is light and fluffy (the longer the better).
Tuesday, 1 March 2011
NEW HOUSE BISCUITS
I had bought some new cookie cutters to use to make a new house present when my brother moved house recently. Ok they did't quite look as great as I'd anticipated thanks to a mix up with the icing. But the actual biscuit recipe (taken from The Great British Book of Baking) is highly recommended.
200g unsalted butter, softened
200g caster sugar
1 vanilla pod
1 medium free range egg
400g plain flour
Put the butter and sugar into a bowl and cream together with the seeds scraped from the vanilla pod until light and creamy.
Gradually add the egg beating well after each addition. Sift the flour into the bowl and mix in slowly until it makes a soft dough (at this point it's easier to get your hands in and shape it into the dough unless you are using a mixer) Divide the mixture into two and wrap each half in cling film and leave in the fridge for about 30mins.
Roll out the dough a portion at a time onto a floured surface. Cut out the shapes you want using cutters and use the trimmings to roll out more dough.
Put the biscuits onto a lined baking tray with some space inbetween each one to allow them to spread.
Chill for 15mins.
Bake in a preheated oven at 180 degrees C for 9 to 12 minutes (mine too about 15 but these were quite large biscuits) They will start to turn golden when they are cooked, you may need to turn the tray halfway through to make sure they cook evenly.
Leave to cool on the tray for a minute or two and then transfer to a wire rack and leave until completely cool.
To decorate:
500g icing sugar
1tbsp lemon juice
colouring pastes or food colouring
Mix half the icing sugar with 2tsp of lemon juice and 2tbsp cold water to make a stiff icing that can be piped (this was my mistake: using too much water making the icing too runny!!)
Spoon a small amount into a piping bag and pipe the edge of the biscuit.
Using the remaining half of icing sugar and add the lemon juice and water as above. Also and a few drops of extra water to slacked the icing. Make up colours you require using the paste or colouring in seperate bowls. When the outline has hardened up you can flood the biscuit with the coloured icing using a palette knife or a piping bag.
Sunday, 13 February 2011
MARMALADE
So my first attempt at marmalade wasnt great!! I got a bit distracted and left it in the pan too long and it started to burn, it's still edible but the second batch is much better thankfully.
4 Seville Oranges plus juice of one extra orange
approx 1kg sugar
1.7 litres water
You will need to weigh the oranges to begin with and double this weight is the amount of sugar you will need later.
Halve the oranges and squeeze out all the juice.
Scoop out all the pulp and pips into a square of muslin laid over a sieve and tie the muslin up.
Finely slice all the pith and skin (you can use a food processor for this if you have one).
Put the water, muslin bag and the sliced skin into a pan and simmer uncovered for about 1 and a half to 2 hours, the skin will need to be really soft.
Remove the muslin bag and squeeze it against the side of a sieve to get the last juice and pectin out(this helps the marmalade to set)
You can throw the contents of the muslin bag away now.
Put 2 or 3 small dishes or egg cups in the freezer.
Add the sugar weighed out previously and on a low heat leave the sugar to dissolve, stir occasionally.BE careful not to let it boil until the sugar has completely dissolved.
Increase the heat and bring to a boil without stirring after 10mins check for the setting point.
To do this take the marmalade off the heat and take a small amount out and put onto a small dish from the freezer. Push the liquid with your finger and if it wrinkles slightly and doesnt run back it's set.
You may need to do this several times (returning the pan to the heat and boiling for another 2 minutes) to ensure you don't miss the setting point.
Once its at its setting point stir in the juice of one seville orange to give it an extra kick.
Leave to cool for 10mins. Remove the scum from the top and ladle into sterilised jars.
LEMON CURD CAKE
This is a Victoria Sponge with a lemon flavour and a lemon and cream filling.
225g butter, softened
225g caster sugar
4 eggs
225g self raising flour, sieved
zest of 1 lemon
juice of 2 lemons
icing sugar
300ml double cream
jar of lemon curd
Cream together the butter and sugar and add one egg and one tablespoon of the flour, repeat with the eggs and flour and then incorporate the rest of the flour.
Add the zest of a lemon and the juice to loosen the mixture to a smooth dropping consistency.
Grease and line 2 20cm cake tins and pour half the mixture into each tin.
Bake at 170 degrees C for 20mins or until a skewer comes out clean.
Leave to cool in the tin for a few minutes before transferring to a wire rack to cool completely.
Once the cake is cool, spread a generous layer of lemon curd over the top of one cake and the bottom of the other.
With a whisk whip the cream until it forms soft peaks. Spoon the cream onto the bottom layer of the cake and carefully put the top cake on. Dust with icing sugar.
Sunday, 23 January 2011
JAM DOUGHNUT MINI MUFFINS
125ml milk
85ml corn or vegetable oil
1 egg
1/2 tsp vanilla extract
200g self raising flour
100g caster sugar
12 tsp strawberry jam
100g unsalted butter
150g granulated sugar
This is a recipe from Nigellas How to be a Domestic Goddess. I've had this book for years and years and can't believe I have never made these muffins before. I think I assumed they'd be tricky. But trust me they are not!
These are the easiest cakes to make and very nice too. If you don't try anything else, please have a go at these.
Preheat the oven to 190 degrees C.
Mix together the milk, oil, egg and vanilla extract in a measuring jug.

In a bowl combine the flour and sugar.

Add the wet ingredients to the dry and mix until just combined. Don't worry about the lumps if you try to get them out you'll overmix the batter and it'll make the muffins tough.

Put a teaspoon full of the mixture into some silicone fairy cake cases.

Ontop of this add a small amout of jam. Then top the muffin with another teaspoon of the muffin mixture.
Pop into the oven for 20mins.
Meanwhile, melt the butter and put the sugar into a shallow dish.
When the muffins come out of the oven, dip into the butter and then roll in the sugar.

These are best served warm but as you wont want more than one (well maybe two at a push!) in one go you can heat them in the microwave for 10 - 15 seconds.

Saturday, 22 January 2011
OAT AND RAISIN COOKIES
So as not to waste the oats bought for the oatcakes I made up a batch of oat and raisin cookies this morning. I used the recipe from Rachel Allen's book Bake.
110g butter, softened
110g caster sugar
110g soft light brown sugar
250g oats
1 egg
1tsp vanilla extract
1tsp salt
2tbsp water
110g self raising flour, sieved
110g raisins


110g butter, softened
110g caster sugar
110g soft light brown sugar
250g oats
1 egg
1tsp vanilla extract
1tsp salt
2tbsp water
110g self raising flour, sieved
110g raisins
First you need to cream together the butter and sugars until it is light and fluffy.

Next add the egg, vanilla extract and water to the mixture and beat it in to the mixture.

Add the flour, oats and raisins and mix.

Roll a spoonful of the mixture into a small ball about the size of a walnut and pop onto a baking tray.

Bake in the oven at 180 degrees C for 15mins.
Leave them to cool for a minute or two before transferring to a wire rack so they don't fall apart.

Rachel says in her book that these go really nicely with milk and indeed they do!
Friday, 21 January 2011
SCOTTISH SHORTBREAD
And on Burns Night what else could there be to go with the coffee other than shortbread!
This recipe is courtesy of Delia.
175g butter at room temperature
75g caster sugar
175g plain flour, sifted
75g fine semolina.
I put the butter in the microwave for 20seconds as I had forgotten to leave it out at room temperature but once the butter is soft you need to add the caster sugar and beat it in with a wooden spoon.

Next add the sifted flour and semolina and beat this into the butter.

It's easier to use your hands at this point to bring the mixture together and form a dough.

On a lightly floured surface roll out the dough to roughly the same size as your loose bottom tin (20cm) then place the shortbread in the tin.

Using your fingers push it into the sides and make sure it's even all over, then a tip from Delia is to use a glass to roll the dough in the tin to make it smooth.

Prick the shortbread all over and place in the middle shelf of a preheated oven (150 degrees C) for 1 hour to 1 hour 10 mins.
When it's cooked use a palette knife to mark out the 12 slices and leave to cool inside the tin.

Once it's cool you can remove the shortbread from the tin and cut into slices. Enjoy!
CHEESE AND ROSEMARY OATCAKES
As it's Burns Night on the 25th January we usually have a family get together on the nearest weekend to this day.
I always like to serve oatcakes with cheese as part of the celebrations but I usually find them a bit dry. So this year I've decided to put a spin on tradition and have a go at a variation on them.- 100g (4oz) rolled oats
- 100g (4oz) plain flour
- 2 tsp dried rosemary
- salt and freshly ground black pepper
- 50g (2oz) butter
- 100g (4oz) Mature Cheddar, grated
- 1tsp clear honey
- 3tbsp milk
First you need to combine the oats, flour, rosemary, salt and pepper in a bowl.


Add the butter and rub with your fingertips until they resemble breadcrumbs.
Next you add the grated cheese and mix in well.
In a small bowl mix together the honey and milk.
Add the milk and honey to the bowl of dry ingredients and use your fingers to form a dough.

If you find the mixture a little dry before rolling it out yo can add a splash more milk to help it bind together.
On a lightly floured surface roll out the dough to about 1cm thick and use a cutter to cut out small rounds.


Place these on a baking tray covered in greaseproof paper and cook for 15mins at 180degrees C. (although do check them at 10mins as mine took a bit less in the oven!)


.
Subscribe to:
Posts (Atom)